How To Guides - Thermostatic Radiator Valves (TRVs)
Thermostatic Radiator Valves (TRVs): Workings, Replacement, and Benefits
A comfortable, evenly heated home is the cornerstone of effective home heating. One device that plays a crucial role in achieving this comfortable balance is the Thermostatic Radiator Valve, often abbreviated as TRV. These handy devices offer individual temperature control for different rooms, enhance energy efficiency, and contribute to lower heating bills. Here's a deeper dive into how TRVs work and a step-by-step guide on how to replace one if needed.
Working of a Thermostatic Radiator Valve (TRV)
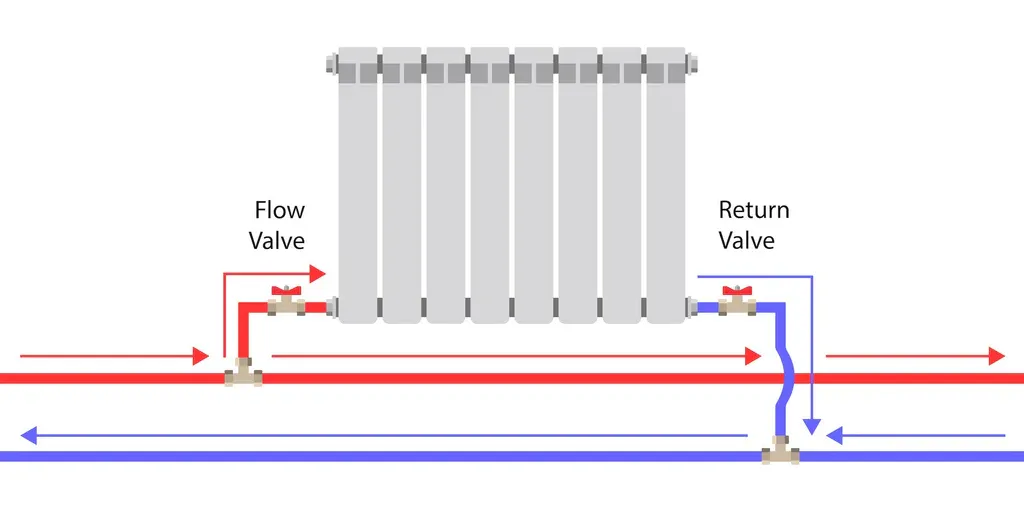
A TRV is a self-regulating valve fitted to radiators in a water-based central heating system. It automatically controls the room temperature by regulating the flow of hot water to the radiator based on the room temperature.
TRVs have temperature-sensitive capsules inside the radiators, usually filled with wax or liquid. As the room temperature changes, this substance expands or contracts. This movement adjusts the TRV and hence the amount of hot water flowing into the radiator, effectively controlling the radiator's heat output.
Replacing a Thermostatic Radiator Valve
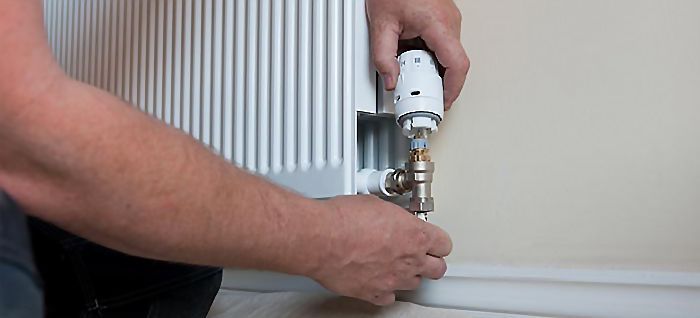
While TRVs are created for durability, they can wear out, malfunction, or simply become outdated over time. Here's how you can replace one:
1. **Drain Radiator** - Before you start, turn off the heating system and let the radiators cool down. Use a radiator key or bleed tool to open the bleed valve and allow any excess water to drain out.
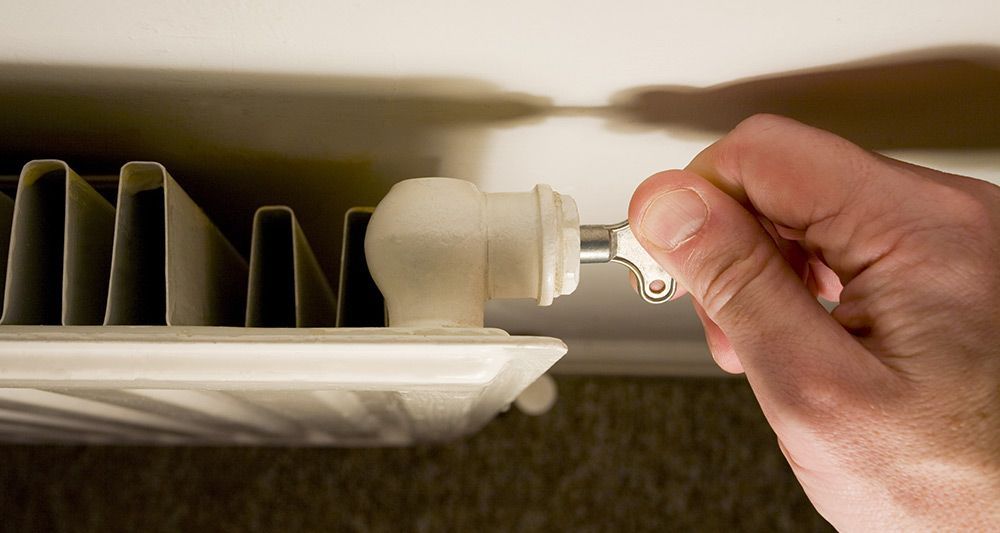
2. **Remove Old TRV** - Close both the TRV (by turning it to the zero or OFF setting) and the lockshield valve (usually on the other end of the radiator). You can then remove the nut connecting the TRV to the radiator (use a water-absorbing cloth or container to catch water drips).
3. **Fit the New TRV** - Before fitting the new TRV, please apply some PTFE tape to the radiator tail threads for a better seal. Now, fit the new valve onto the radiator and tighten the nut.
4. **Confirm Correct Positioning** - Make sure that the new TRV is pointing upwards, and the head is the right way up.
5. **Release Lockshield Valve** - You can now slowly open the lockshield valve to let water back into the radiator. Check for any leaks at this point and adjust the TRV as required.
6. **Adjusting the New TRV** - After replacing, begin heating up your system. Try adjusting your new TRV in a stepwise manner to find the ideal setting.
Conclusion
Thermostatic Radiator Valves (TRVs) are an excellent means to manage your domestic heating needs smartly. They enable you to control your room temperatures individually, promoting energy efficiency, and offering potential savings on energy bills. It's worth the effort to ensure they're in good working order. While the replacement process may seem intimidating, a focused approach (and professional help if needed) can make the process manageable. Efficient heating is within your control – don't shy away from it!